Thursday, October 29, 2015

What's Inside My Car?

So, once again, I haven't been the best student when it comes to adding my personal touches to my blog. I am trying to make up for that. This is the first of the series 'What's Inside My Car?' which is a play on 'What's Inside My Bag?'. I work at a car dealership where I tag cars that come in for service and a number of other tasks. On one side of the scale, some people come in with spotless interiors and there are unfortunately people who come in on the opposite side of the scale. It is easy for me to point out a person's personality in the stuff that is left in their car. This is mainly any item hanging from their mirror and that is in their front seats and sometimes the back seat. Each car is different and it coincides with those who drive them. I will do my best to post a new entry every few days.

Now we get to learn what is in my car. I took these pictures a week ago and my car has gotten a few more things thrown in it but it is mainly boxes for packing, I hope to move soon. This first image is of a little angel that my Grandma Aggie had gotten for me shortly after I got my car which is my first car. It says 'Never Drive Faster Than Your Guardian Angel Can Fly'. The second image is of a little bear toy that was left in the car when I got it. It was my great-grandma's car that she sold to me in exchange that I take her every Friday to run errands. I didn't want to get rid of it and think of it as one thing I have to remind me of my great-grandma. The third image is of disposable chopsticks. There was an event at work and one of the food items served was sushi. It was delicious but there was a whole tray left over by the end of the night. I took that whole thing home! I took all of the chopsticks because I think if you are going to eat Chinese food, it should be done using chopsticks. My boyfriend and I even look for reusable ones whenever we go to the store. I also have tissues, bandages, perfume, lady products, a gardening tool, and a flashlight in my center counsel. You know....just the essentials.


Text Art Part Three: Textorizer, Textorizer 2, & Excoffizer

I have mixed feeling towards these websites. I didn't venture far into obscuring the image with text because I really wanted to be able to still distinguish the image. As I changed the settings, I like it less and less for the image to become more fragmented as the text settings changed. I know we are supposed to use an image that we've taken during the course but I wanted to use a different picture to mix up the content of my images. I used another image of myself for Textorizer. I played around with the settings and fonts and whatnot and found something very pleasing to me.
The second image I used was for Textorizer 2. I persoanlly didn't see a difference between Textorizer and Textorizer 2, so if anyone know the difference please let me know. I used my 'Vouchers Welcome' image from my urban landscape assignment. The window for which this image comes from was an exchange store for appliances. This like vacuum cleaners, washers and dryers, refrigerators, and yard appliances like lawn mowers, leaf vacuums, and so on. Although, there were none of these things in the store. It was pretty much emptied of everything and even partly gutted, I assume for remodeling.

My third imaged utilized Excoffizer. This website turned your image into a image made up of crazy lines. When you initally open Excoffizer, the default image provided is of Salvador Dali, a surrealist artist with an amazing mustache. The lines that make up the image is flowing and make the image flux like looking at one of the hypnotic spirals. I used another image from my urban landscape assignment. I didn't get too crazy with my lines but I was happy with my results. I get a candy stripe vibe from this image or of an old school candy poster.

Text Art Part Two: Tagxedo


The part of the weekly assignment utilized a website called Tagexdo. This website takes an uploaded image, or an image template that the website provides, and applies text to the image. Very similar to the previous part of the assignment. Although, I faced problem after problem with the settings. It may be because I use Google Chrome for my laptop and it does not work for it. I had to use Internet Explorer which I don't use, like, at all. Just to upload an image, the settings were very deceiving. But, after Googling and searching I figured it all out. And, I enjoyed this website the most. This might be because I used and image of myself. Again, I had trouble figuring out how to change the font, size, color, and so on. But, in the end I love how it turned out. I picked words that I though described me well, or at least how I feel about myself, and a font that matched these words. Overall, I would use this again because you could put this on a shirt or coffee mug. I might have to use this for upcoming holiday gifts.

Text Art Part One: GlassGiant and Text-Image


This week has been very crazy for me. But, that is on my own accord. I had planned to start this assignment early over the weekend but I had a drawing to do for class Friday, a wedding I almost forgot about Saturday, and a pumpkin to carve Sunday. The pumpkin should have only taken an hour, but I had many interruptions unfortunately.

As I dived into this week's assignments, I wish I would have taken the time earlier to experiment more. Although I think I did a good job with what I created, I wish I had more time to tweek every detail and just explore the settings more. Part one of this week's assignment utilized GlassGiant, which took an image you upload and uses a character encoding scheme to transform your image into a text based image. This image is my 'No Soliciting' image from my urban landscape assignment. I like how the text makes up the image that involves text. The text literally makes up the words 'No Soliciting'. I love it.


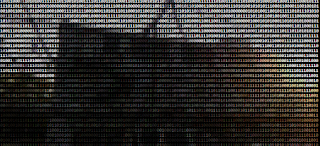
Text-Image pretty much does the same thing. I used another picture from my urban landscape assignment. This is a warehouse off of Monroe Street with a barbed wire fence that unfortunately prevented me from exploring it more. I loved that it kept the color from my original image. The initial setting used numbers to generate the image and I changed to different words like 'warehouse' 'wire' 'colossal' and so on. But, I didn't like the effect as much. So, I went back to the initial setting and found that the numbers made the image look more complete and less fragmented.


.

Thursday, October 22, 2015

Confession #2


Part Three of Generative Art: Flame Painter

I did not like this program as much as the other two. I could not get it to do what I wanted it to do. All you had to do was swipe your finger and it went blazing. I made my sister and my name as the first picture. I liked making the flame swirl and also having it condensed into that bright white glow.  I know I didn't go too far with these images but it just wouldn't do what I wanted it to. I had plenty of ideas but none of them worked out the way I wanted them to. This program even had an eraser that I could use but everything I tried did no justice to what I wanted to create. For my second picture, I tried to simplify it in hopes to forfeit some of the control in my creating process. As I have mentioned before, I have a touch screen laptop. If I used my mouse cursor, I could hover over a specific spot and it would condense to that bright white color. If I used my finger to tap on the screen to start a line, it would slash a line of color across the screen. I used this to my advantage. It reminded me of a Piet Mondrian painting of the squares and primary colors. By taping on my screen in different ways, I was able to change the thickness of each lines.

Part Two of Generative Art: Scribbler Too

 This is the second program we used. It was similar to the first one but had some major differences. For starters, the generative lines connect as the user draws out the image. In the previous program, an outline was drawn and then the user pressed a 'start' button to start the generative process. This program still gives the user the ability to change the color, thickness, and 'scribbleness' but it is available as you draw and not only after you start the generative process in the first program. My favorite thing about this program is that it allows the user to upload an image that they can trace. I used this to trace a picture a girl. The original picture was a blonde, pale girl. I wanted my image to be slightly more striking so I added more lines to the hair to make it darker and a thicker line above the eyes. Note: these are not the same lines that distinguish the eyebrows. I am very proud of my second picture. I'm going to say this now and I'm going to flaunt it, I did NOT use a picture to trace. That is my own hand that I used to look at. I loved how I could utilize the generative lines to look like the tiny lines of you fingers and hand. I really enjoyed this and that says something due to the fact that I haven't enjoyed the previous projects. It was pretty close to just drawing on paper and that is probably why I liked it as much as I did.

Part One of Generative Art :Scribbler


I really like experimenting with this program. While you can determine a general outline, it is up to the generative output program to determine what lines go where. I don't tell it exactly where to go. As much as I like having control over every detail, it was nice just to see the different ways my initial outline could turn out. There were setting to change the color of the lines, how 'scribbly' the lines are, and the thickness of the lines. It was really left to us what we created and there weren't too many boundaries other than putting enough effort into making it. I have a touch screen laptop so it was really fun to practically draw just by touching my screen. It made the whole process that much more fun because drawing is a medium that I like the most. I made the mushrooms first because I wanted it to be something that people could recognize right away. My second creation I wanted to be a little more vague. It has some obvious characteristics but I kept it simpler so that it could be interpreted as different things. Although, I won't be terribly upset if people only see a specific thing in my picture. 

Monday, October 19, 2015

I Was Being A Bad Student

I unfortunately realized that I was not utilizing my blog they way I was supposed to. Granted, I have been posting my projects from my Digital Media class but there is another purpose for it. Early on in the semester, we had to decide what our theme or focus was for our blog. I chose to make things personal. This means that I post confessions about myself like secrets, faults, and little celebrations in my life that make me the person I am today. I will also we doing a twist on 'What's Inside My Bag' but I will get into it more when I make the post itself. My goal for my personal posts is to post one picture of myself every few days, or once a day if possible, providing a confession or the like. I want the people reading this blog to know the things that make me who I am and to see the things that I'm proud of, that embarrass me, that make me ponder the most, the things that scare me and so on. So, for starters, I will post my first confession. It isn't something very serious but it's something that I hold deep within myself that I just enjoy.

Confession #1

Monday, October 12, 2015

Mixing It Up and Mashing It Up


I present to you the combination of a horribly put together song and an equally horrible put together video. I again faced the problem of transitioning well and just couldn't quite figure out a way to make it better. This project focuses on video mashups and the like. The goal was to create a mashup video that works together with the original song of our own creation. As I have clearly stated in the past, I am not good at these types of projects. Although, I did like this a bit better than the song creation project. There was a lot of searching, cutting, rearranging, and so on. It was a little hard getting started but after listening to each type of 'song' from my original song creation, I was able to start picturing what I wanted the video content to focus on.

Thursday, October 1, 2015

Mixing It Up and Making It Up


This was a very difficult assignment for me. I've realized that I can not count and made this much longer than what was necessary. I'm not quite sure how I managed to do that but at least I gave it my all. And while I was giving it my all, this project was tearing me apart. I could not find good transitions, it was hard to find specific loops, they all sounded the same to me, the process and practice was new to me even after watching the instructional videos, everything that could go wrong went wrong. I'm 99 percent sure I scared my boyfriend due to the smoke and fire coming out of my ears. To be honest, I hope to never use this again later in life. I could have had my boyfriend do this but then I would not have learned anything. I did learn that I dislike this process very much but I also learned that the people who do this are really creative. I like to draw and paint. That is my way of art. I like it. If this is how other people express themselves, good for them. I will be one less person they have to compete with.